I first mentioned my new Basilisk in this post. This has by far been my favourite model to build so far.


As I mentioned in this post, the parts weren’t complete so I had to partially disassemble and re-assemble the Hellhound and Basilisk so that there would be enough parts for both. Part of the puzzle was that they supports for the Basilisk’s Earthshaker Cannon weren’t included. So I improvised using some spare parts.
I started by painting it with similar colours to my infantry models, chimera, taurox, and hellhound. A lot of Administratum Grey, and all the metal parts were primed with Imperial Primer and then highighted with Leadbelcher.

After I started painting, I realized I wanted to do something special for this tank. The Earthshaker Cannon is so iconic of the Imperial Guard Astra Militarum that and unsubtle that I felt it needed something. I wanted to make it something I would be personally proud of. And that meant going back to my Engineering roots and adding some electronics and circuitry.
I wanted to make the gun light up and make sounds. The simplest way to do this would be to scavenge the speaker, light, battery and control circuitry from a Dollarama Toy Gun. I got the below toy for $3 (plus tax).

I must admit, I had a lot of fun exploring the device. It was kind of like an autopsy or a dissection of a mysterious object.

Taking it apart, I discovered it wasn’t very complicated. There was a tiny integrated circuit that handled the noise generation. Connected to the circuit was a simple speaker and a LED. There was also a motor that made the gun vibrate. I wanted to use that to make the tank shake, but it was pretty bulky and heavy.


I decided I wasn’t going to use the vibrating motor thing. But the light and sound were very necessary and I was looking forward to using them.

Actually fitting the electronics into the tank was trickier than I expected. The inside of the tank is actually quite small, so there isn’t much room to work with.
The tank came mostly assembled from the person I purchased it from on eBay, so I actually had to break the tank apart to get inside.

I mangled the battery holder from the toy gun and shoved it into the tank. The batteries are surprisingly bulky! At the same time, I slid the speaker into the forward section below the ‘hatch’, positioned the integrated circuit chip behind the battery, and made sure that the control wires and LED light were free to reach the outside of the tank.

I punched a crude hole int he top of the tank so that the light and control wires would come out. The idea was that the wires would come up just below the Earthshaker Cannon so that they could go into it with minimal distraction.

The LED went into the cannon from behind, and I installed a momentary pushbutton on the back of the cannon. I rather like the way the barrel of the cannon lights up!

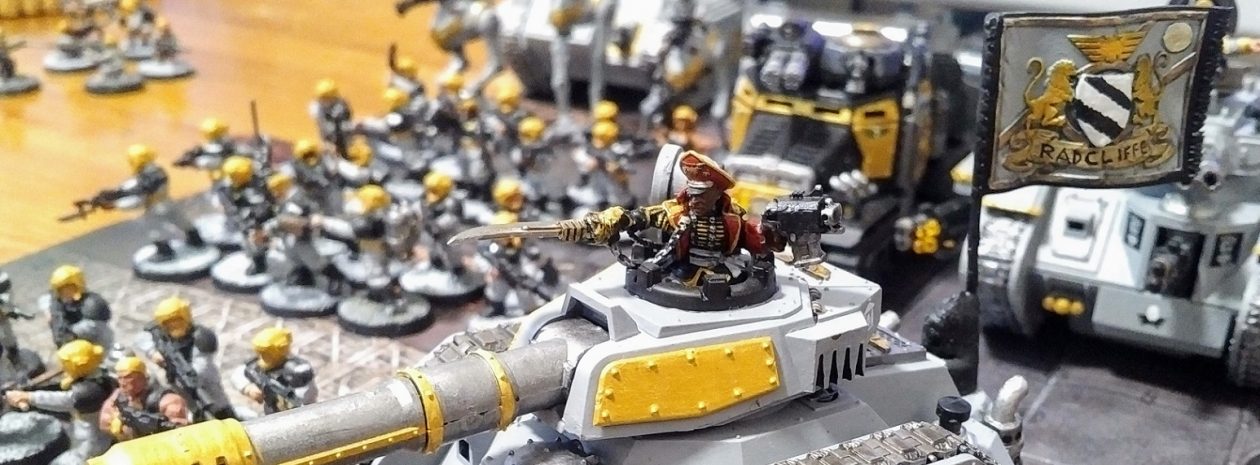
After all that fancy assembly, I needed to finish the paint job to make it presentable. It’s mostly just Administratum Grey with Auric Armour Gold highlights, like the rest of my army. However, I’m proud of how the wash on the skulls and wings on the top of the guard turned out.


Why did I name this tank Bertha? Well, it’s a very unsubtle tank, so I thought it deserved an unsubtle name. And, there’s the historical Big Bertha.


I really enjoy that it’s an ‘active’ electronic model. I plan to incorporate electronics of some sort into future tanks.
My biggest regret is probably that the battery is inaccessible inside the tank. Changing the batteries is all but impossible, and I’m worried about a leak eventually. It’s something I’ll keep in mind for future projects.
Basilisk Tactics:
Both Grumpy Guardsman and Imperator Guides agree that the Basilisk is iconic but not particularly competitive. The main blast is a very impressive S9 AP3 large blast. However, the barrage rules give it lots of trouble. Its minimum range is a whopping 36″ which means it can’t use the Barrage rule within that distance. And scattering 2D6-3″ means it’s pretty likely to miss its target.
One thought on “Basilisk “Bertha””
Comments are closed.